CJCA: Report Example
In this post, I want to share a practical example of how a report can be structured using an approach similar to the one used in Hack The Box’s CJCA certification.
For this example, I will use GoodGames, an Easy machine from Hack The Box, as the basis for writing a practice report. The goal is not to solve the machine step by step, but to show how technical findings can be turned into a clear, organized, and useful report.
Important note:
All technical content used in this example, including attack vectors, credentials, vulnerabilities, paths, evidence, and recommendations, is based only on the GoodGames machine from Hack The Box.This post does not contain information from the real CJCA exam. It does not disclose scenarios, credentials, infrastructure, flags, questions, or findings belonging to the certification.
The report template and style are used only for educational purposes, to practice documentation and professional reporting.
Why use GoodGames as an example?
GoodGames is a good machine for practicing documentation because it allows you to build a fairly complete compromise narrative.
Throughout the lab, you can identify important elements for a report, such as initial enumeration, web application analysis, vulnerability exploitation, use of credentials discovered during the process, initial access, privilege escalation, and technical evidence to support each finding.
This makes it a good scenario for practicing something that is often overlooked: it is not enough to compromise a machine; you also need to know how to explain what happened, how it happened, what the impact was, and how it can be fixed.
Report Approach
For this example, the report will be written as if GoodGames represented an environment belonging to a fictional organization.
The goal will not simply be to say “SQL Injection was found” or “root access was obtained”, but to explain the full attack path in a way that is easy to understand:
- Which service was analyzed.
- Which weakness was identified.
- How the vulnerability was validated.
- What access it allowed.
- What sensitive information was exposed.
- How the impact was escalated.
- What the organization should do to fix the issue.
This approach helps turn a technical exploitation process into a professional report.
Report Structure
The official SysReptor template for CJCA divides the report into several main sections. Each one serves a specific purpose in the document and helps separate administrative information, the executive summary, the offensive phase, the defensive phase, and the appendices.
The template includes the following sections:
- Meta
- Document Control
- Executive Summary
- Assignment
- Phase 1: Grey Box Penetration Test
- Network Penetration Test Assessment Summary
- Internal Network Compromise Walkthrough
- Remediation Summary
- Phase 2: SIEM Alert Validation and Analysis
- Appendix
- Findings
Meta
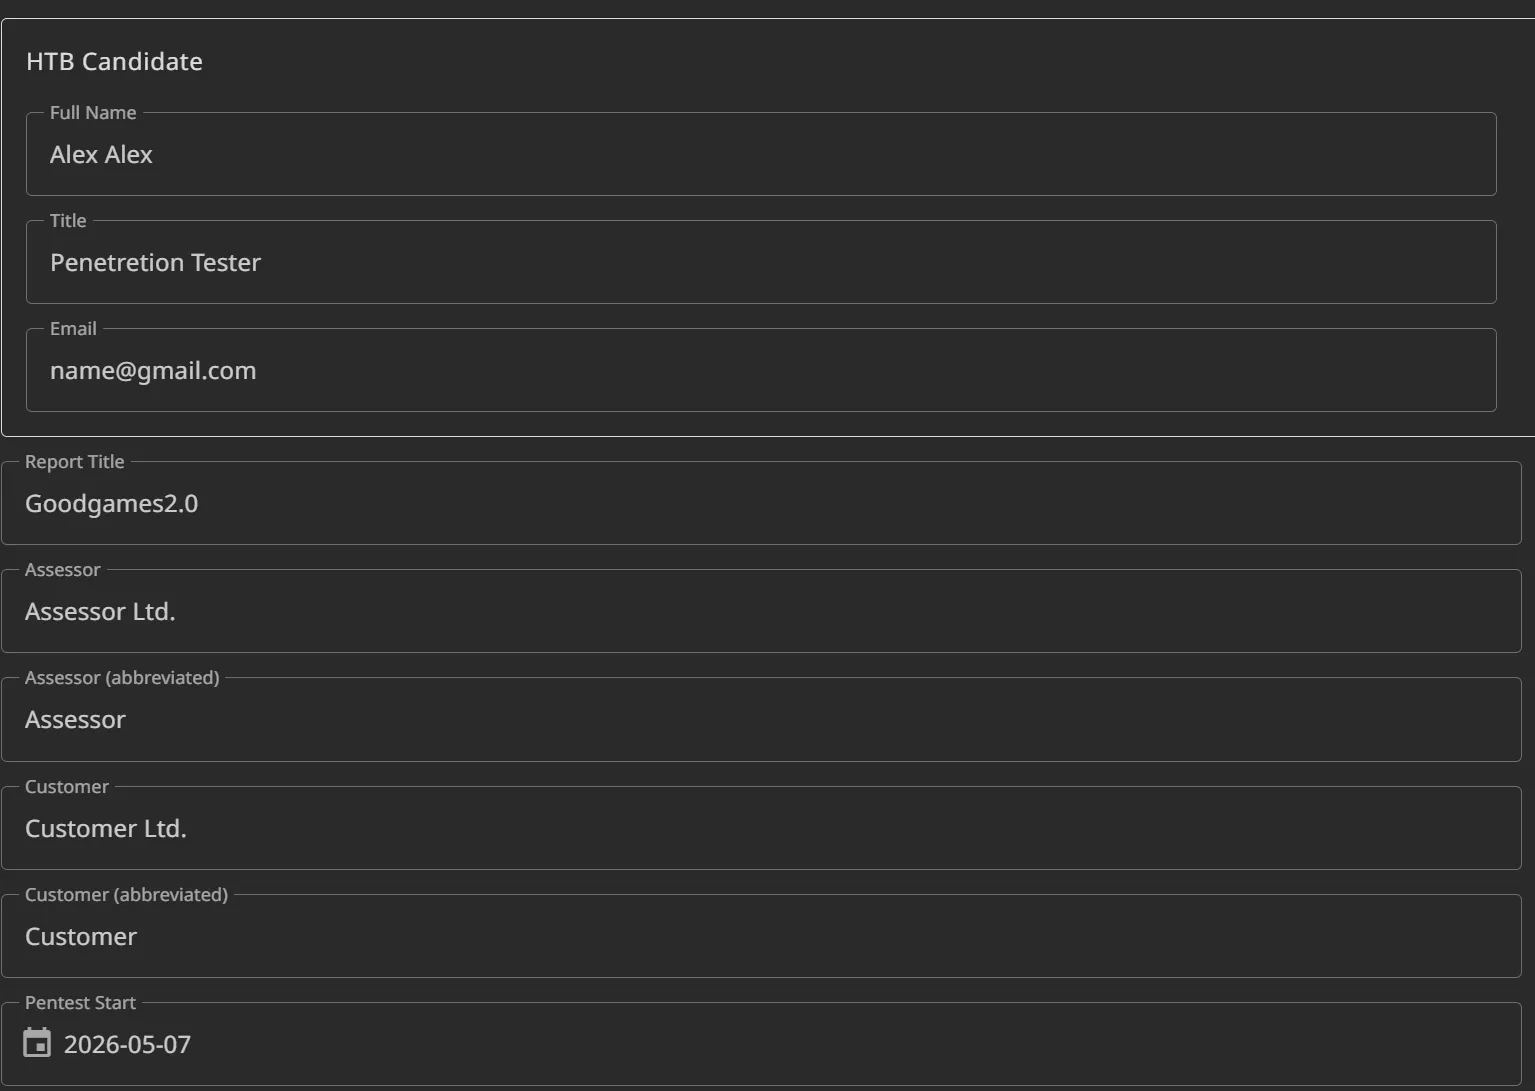
The Meta section contains general information about the report. This is where details such as the client name, candidate name, assessment type, relevant dates, and other administrative information are usually defined. The template uses this data to automatically complete different parts of the document.
In a real report, this section is not usually part of the main technical content, but it is important because it helps maintain consistency throughout the document.
Document Control
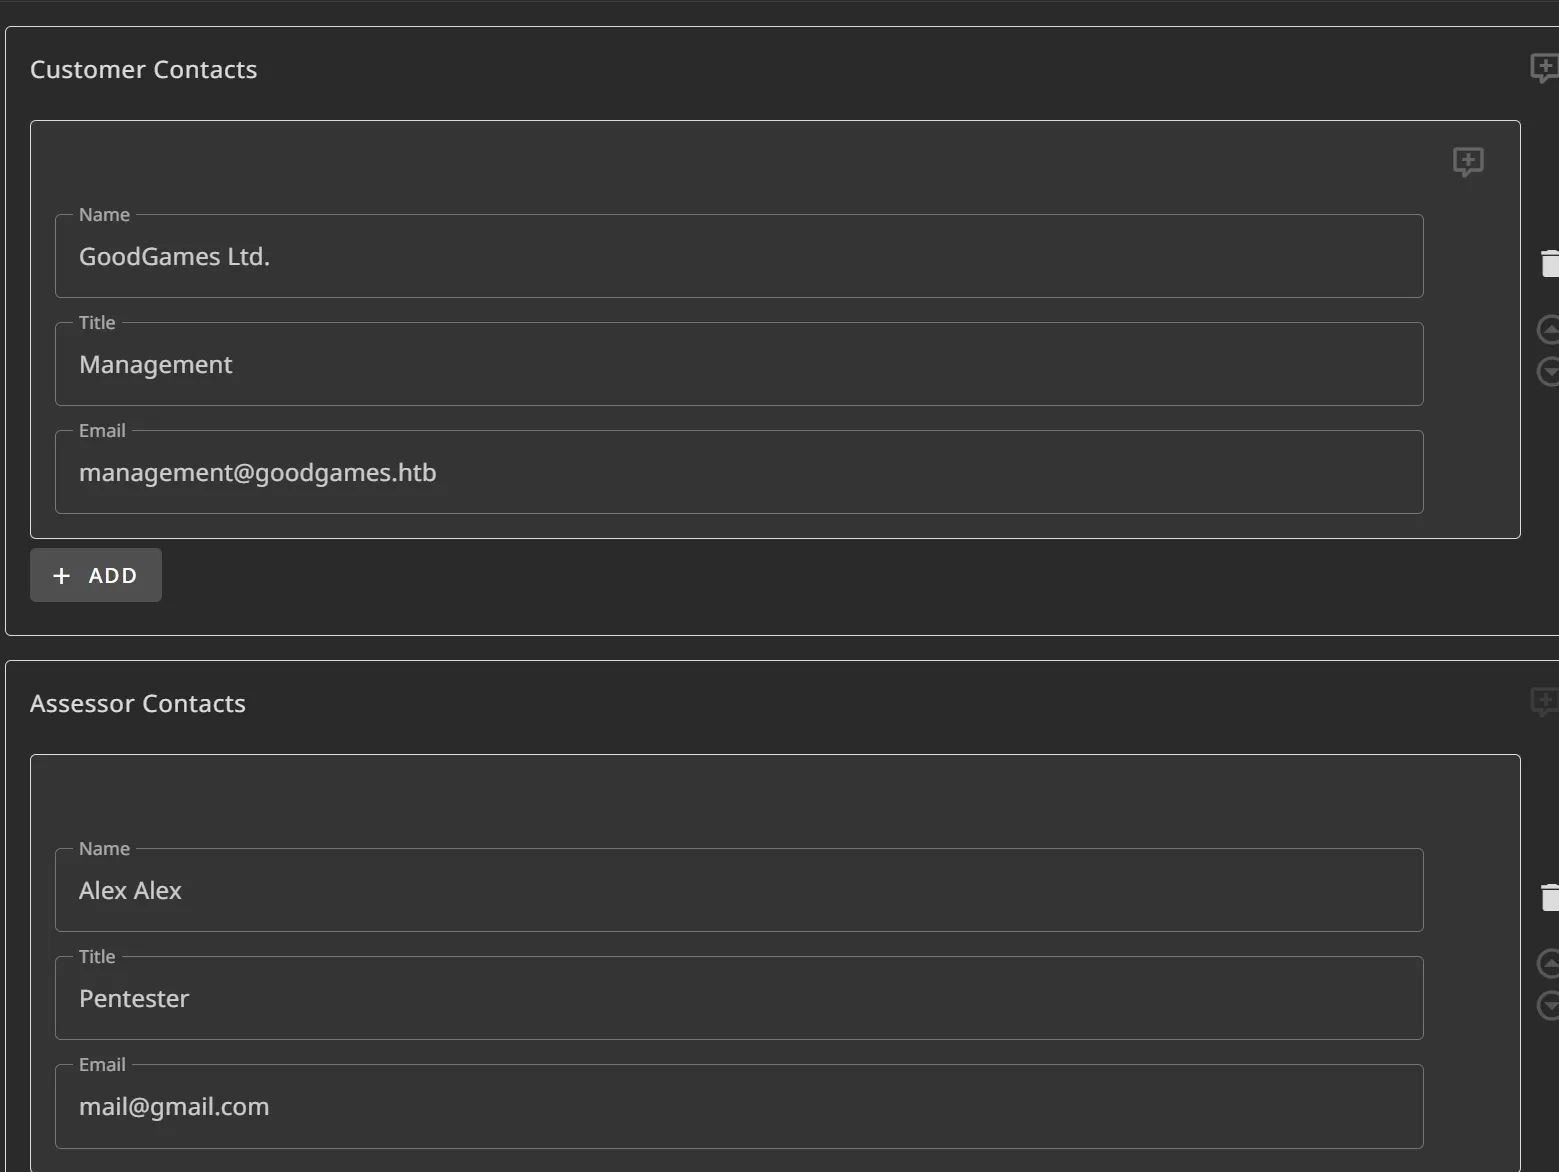
The Document Control section is used to track the document version, authors, modification dates, and report status.
This is useful because a professional report may go through several reviews before it is delivered.
Executive Summary
The Executive Summary is one of the most important sections of the report.
This section summarizes the assessment results in clear language that both technical and non-technical audiences can understand. It is not about explaining commands or payloads, but about communicating the overall impact of the compromise.
Assignment
The Assignment section describes the context and objectives of the assessment.
Phase 1: Grey Box Penetration Test
In the CJCA template, the first phase corresponds to the offensive part of the assessment.
This is where the enumeration, exploitation, initial access, post-exploitation, and privilege escalation process is documented.
Network Penetration Test Assessment Summary
This section summarizes the main results of the offensive phase of the report.
In the CJCA template, this part is used to present an overview of the findings identified during the penetration test. It usually includes the total number of vulnerabilities found, their severity, a table with the name of each finding, and a summary of the hosts or users compromised during the assessment.
In a real report, this section helps the reader quickly understand how severe the compromise was before moving into the technical details of each vulnerability.
For this example, the GoodGames machine from Hack The Box will be used as the only evaluated target. Therefore, instead of listing multiple internal hosts as would happen in an enterprise environment or a full exam scenario, the summary will focus only on the findings identified within this lab machine.
This section is divided into several subsections, each focused on summarizing an important aspect of the offensive phase.
Summary of Findings
This subsection should include a general summary of the findings identified during the assessment.
It usually indicates how many vulnerabilities were found, how they are distributed by severity, and the names of the main findings. Its purpose is to provide a quick view of the level of risk identified during the test.
The technical details of each vulnerability are not developed yet. That explanation belongs in later sections of the report. This part only presents a summarized and organized view of the findings.
Example:
| # | Severity Level | Finding Name |
|---|---|---|
| 1 | High | SQL Injection in Login Form |
In this case, the finding summarizes a vulnerability identified in the GoodGames web application that allowed SQL queries to be manipulated through the authentication form.
Exploited Hosts
This subsection should list the hosts that were compromised during the assessment.
It usually includes information such as the IP address or hostname, whether it is within the assessment scope, the method used to compromise it, and a brief note about the type of access obtained.
The goal of this part is to show which systems were affected and how they relate to the attack chain. In an environment with multiple hosts, this subsection helps explain how the compromise progressed across the network.
Example:
| Host | Scope | Method | Notes |
|---|---|---|---|
| GoodGames | Internal | Web Application Exploitation | Initial access path identified through the vulnerable web application |
In this example, the compromised host is only the GoodGames machine, since the report is based on an individual lab and not on an internal network with multiple targets.
Compromised Users
This subsection should document the users that were compromised or used during the test.
Here, you can include the username, the host where it was used, the method through which access was obtained, and a brief description of the privilege level reached.
This part is useful for understanding which accounts were affected, whether credential reuse occurred, whether access to privileged users was obtained, or whether any account allowed the attack escalation to continue.
Example:
| Username | Host | Method | Notes |
|---|---|---|---|
| Standard System User | GoodGames | Credential Reuse | Access obtained after credentials were discovered during the web application compromise |
In a public or practice report, it is recommended to avoid including full credentials. If they are included as evidence, they should be partially redacted.
Username: admin
Password: super****
Changes / Host Cleanup
This subsection should document the changes made to systems during the assessment and the cleanup actions performed at the end of the test.
In a professional report, this part is important because it records created files, uploaded tools, modified users, executed payloads, altered configurations, or any other relevant change made during the test.
It should also indicate whether those changes were reverted or whether any cleanup action remains pending. Its goal is to maintain transparency about the operational impact of the assessment.
Example:
| Host | Scope | Change / Cleanup needed |
|---|---|---|
| 172.19.0.1 (GoodGames Host) | Internal | Remove the test SUID binary located at /home/augustus/bash_host. |
In the case of a Hack The Box machine, cleanup does not have the same impact as it would in a real production environment. However, including this subsection helps practice a good professional report structure.
Internal Network Compromise Walkthrough
This section describes the compromise path followed during the offensive phase of the assessment.
Unlike the Network Penetration Test Assessment Summary, which presents a summarized view of the findings, this section explains how the process went from initial enumeration to system compromise.
In the CJCA template, this part is usually divided into two main subsections:
- Walkthrough Summary
- Detailed Walkthrough
- Collected Evidence
The idea is to build a clear attack narrative, showing how each finding allowed progress toward the next step. It is not just about pasting commands or screenshots, but about explaining the reasoning behind each action and how it relates to the final impact.
Walkthrough Summary
This subsection presents a high-level summary of the compromise chain.
Here, you should briefly and clearly explain the general path followed by the attacker. The objective is for the reader to understand the full story of the compromise without going into all the technical details yet.
This part usually includes:
- Initial entry point.
- Main exploited vulnerability.
- Sensitive information obtained.
- Method used to obtain initial access.
- Technique used to escalate privileges.
- Final result of the compromise.
Detailed Walkthrough
This subsection contains the complete technical development of the compromise.
This is where the step-by-step process is documented, including evidence, relevant commands, screenshots, and an explanation of each phase of the attack.
The goal is to demonstrate how each finding was validated and how progress was made within the environment.
| Step # | IP/Host/Target | Action/Command | Result |
|---|---|---|---|
| 1.1 | 10.129.30.54 | The Tester performed full TCP port discovery using Nmap. | TCP port 80 was identified as open. |
| 1.2 | 10.129.30.54 | The Tester performed service and version enumeration against the discovered port. | Port 80 was running Werkzeug httpd 2.0.2 with Python 3.9.2. |
| 1.3 | 10.129.30.54 | The Tester reviewed HTTP headers and performed web technology fingerprinting. | Werkzeug/Python technology was confirmed, and the GoodGames web application was identified. |
Collected Evidence
This subsection is part of the Internal Network Compromise Walkthrough and is used to add the evidence collected during each step of the compromise chain.
This is where images, screenshots, executed commands, and relevant results should be included to help build the technical narrative of the attack. The idea is not to add screenshots without context, but to accompany them with a brief explanation of what was done, what was observed, and why that evidence is important for the report.
Each piece of evidence should be tied to a specific step in the walkthrough. This allows the reader to follow the compromise flow in an orderly way, from initial enumeration to access or privilege escalation.
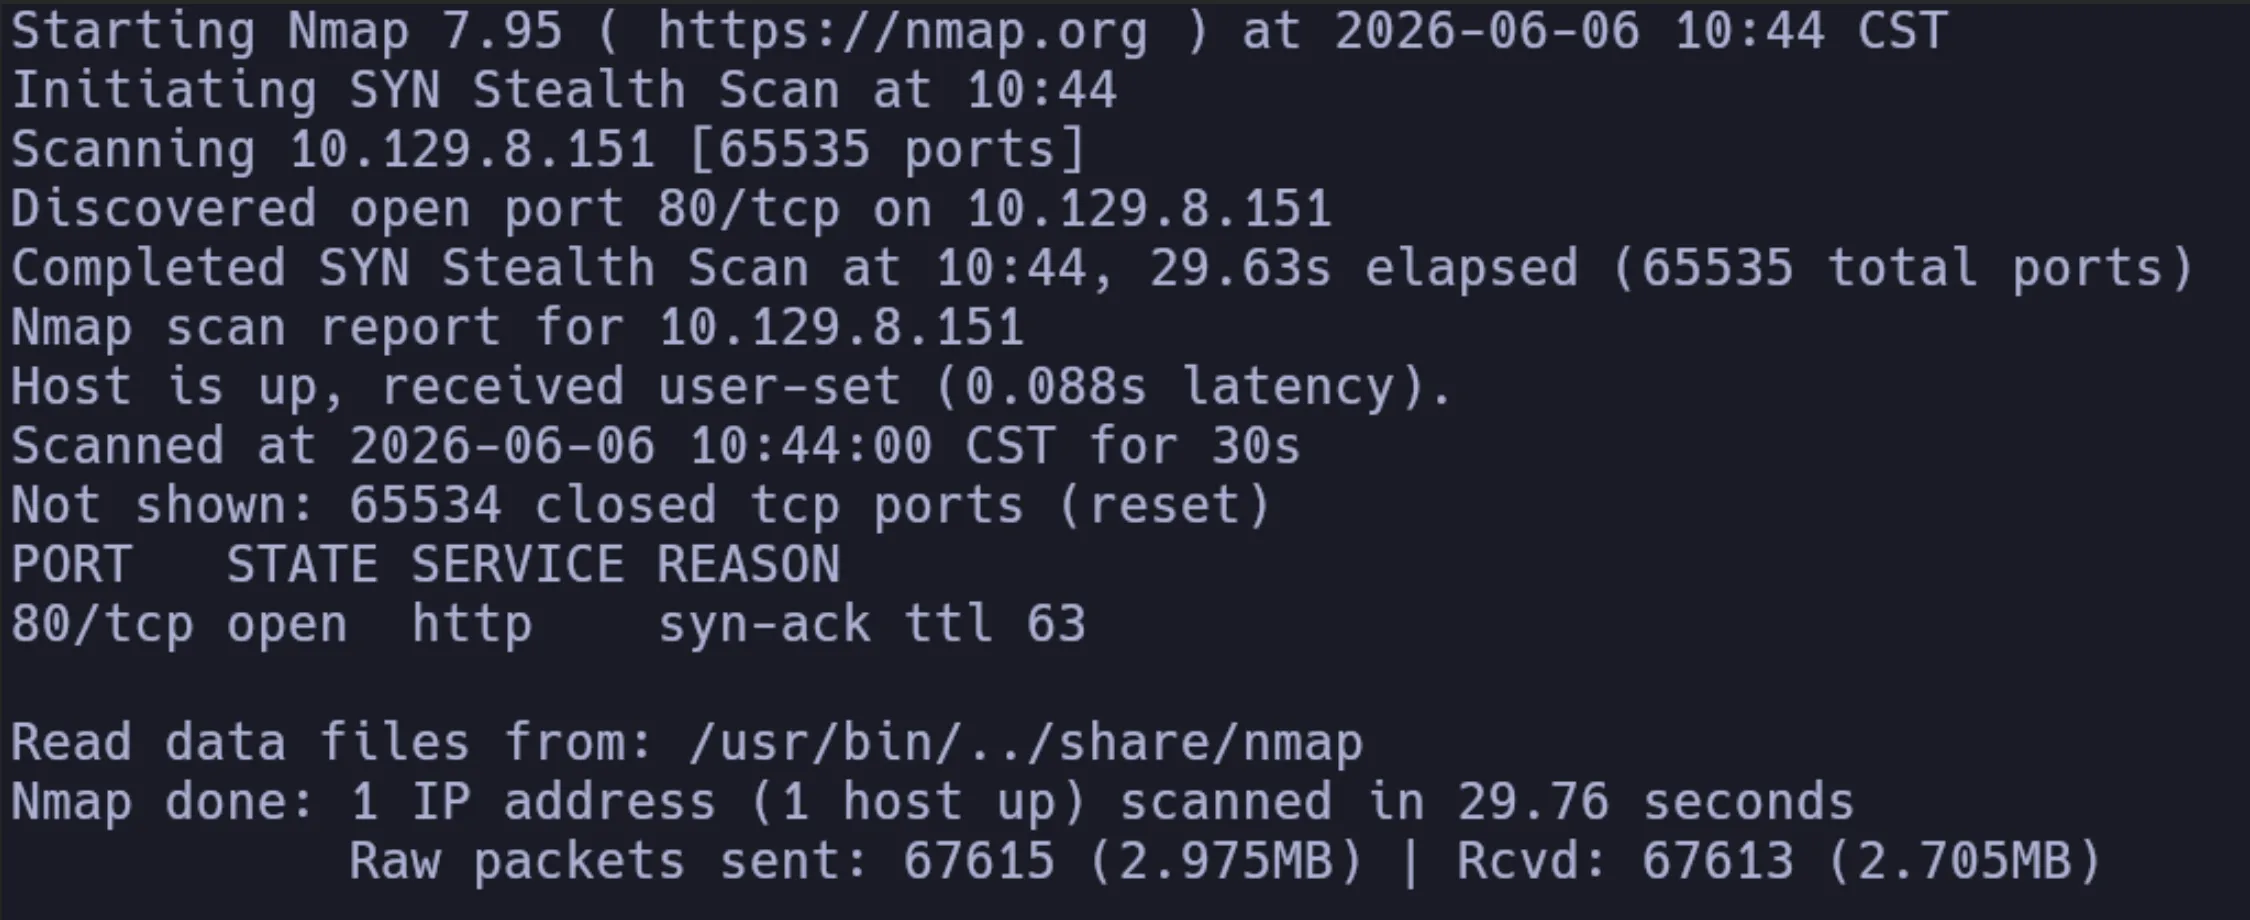
1.1 - 10.129.30.54 (GoodGames) - TCP Port Discovery
The Tester performed TCP port discovery against GoodGames to identify exposed services.
sudo nmap 10.129.30.54 -p- --open -sS -min-rate 500 -n -Pn -vvv -oG allPortsResult:
Open ports: 80
1.2 - 10.129.30.54 (GoodGames) - Service and Version Enumeration
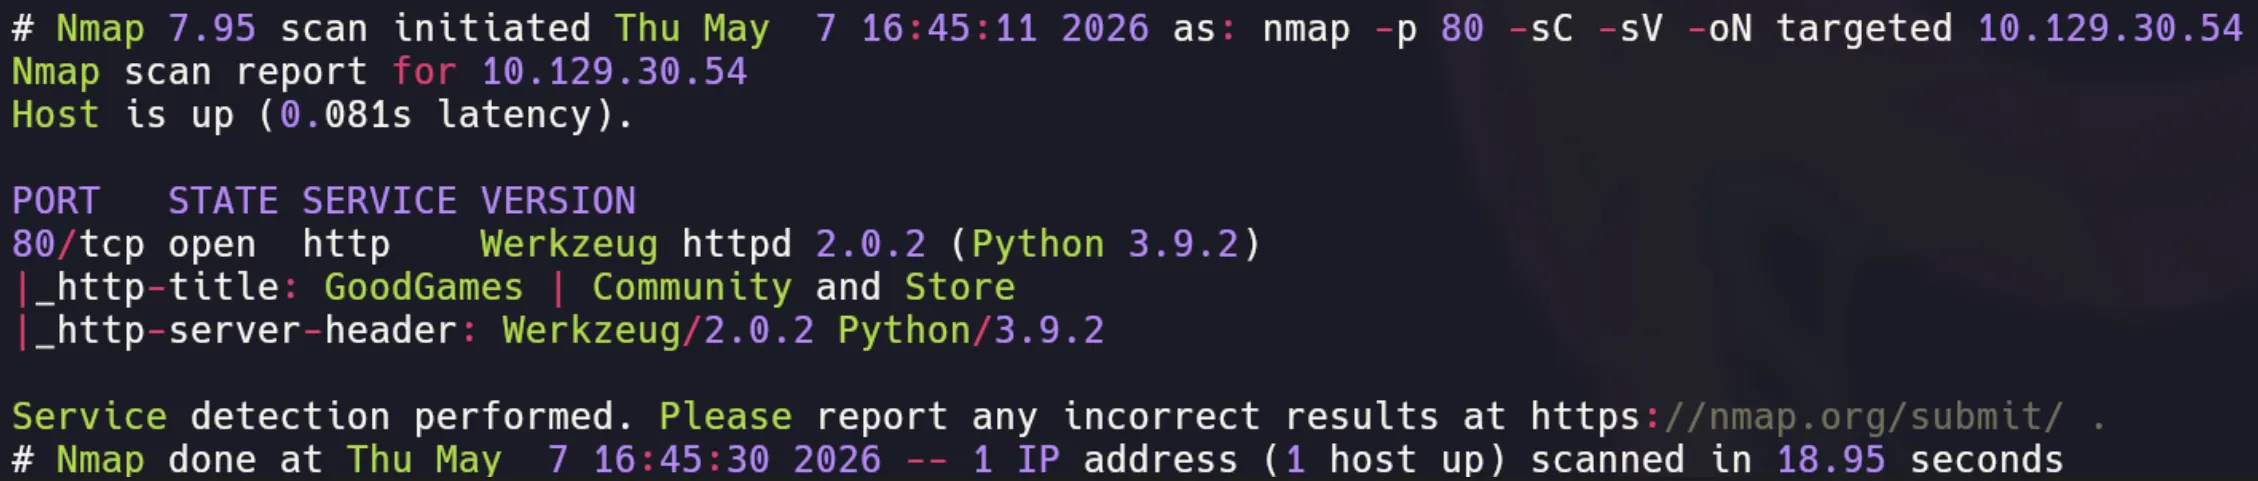
The Tester performed service and version enumeration against the discovered HTTP port.
sudo nmap 10.129.30.54 -p 80 -sC -sV -oN targetedResult:
Port 80 was running Werkzeug httpd 2.0.2 with Python 3.9.2. The web application title was identified as GoodGames.
Remediation Summary
The Remediation Summary section summarizes the recommended actions to address the findings identified during the assessment.
In the CJCA template, this part is usually divided into three groups based on the suggested timeline for applying the remediations:
- Short Term
- Medium Term
- Long Term
It is important for the recommendations to be directly related to the findings identified in the report. The goal is not to add generic advice, but to propose concrete actions that help reduce the risk associated with each identified vulnerability.
For example, if one of the findings was a SQL Injection vulnerability, the remediation should be related to input validation, parameterized queries, secure error handling, and security testing in the web application.
Short Term
This subsection should include remediation actions that should be applied as soon as possible.
These are usually urgent measures intended to reduce immediate risk, contain the impact, or prevent the vulnerability from remaining exploitable.
This may include actions such as:
- Fixing critical or high-severity vulnerabilities.
- Rotating compromised credentials.
- Disabling insecure access.
- Restricting excessive permissions.
- Removing exposed sensitive files.
- Applying priority patches.
These actions should be directly connected to the most serious findings in the report.
Medium Term
This subsection should include actions that require more planning, validation, or moderate changes to the infrastructure or application.
These remediations usually aim to strengthen security controls to prevent the same issue from happening again.
This may include actions such as:
- Improving authentication controls.
- Implementing stronger validation in the application.
- Reviewing service configurations.
- Strengthening password policies.
- Hardening affected systems.
- Improving monitoring of relevant events.
These actions complement the immediate fixes and help reduce the likelihood of future exploitation.
Long Term
This subsection should include strategic or continuous improvement actions.
These are usually not changes that can be applied overnight, but initiatives that help improve the organization’s overall security posture.
This may include actions such as:
- Implementing periodic security reviews.
- Establishing a formal vulnerability management process.
- Performing recurring penetration tests.
- Integrating security into the development lifecycle.
- Improving detection and response capabilities.
- Training technical teams on security best practices.
These recommendations should still relate to the findings, but from a broader and more preventive perspective.
Phase 2: SIEM Alert Validation and Analysis
This section corresponds to the defensive phase of the report.
In the CJCA template, this part is used to document the analysis of alerts generated by a SIEM platform. The goal is not to exploit systems, but to review events, validate alerts, and determine whether each one represents real malicious activity or a false positive.
Unlike the offensive phase, the focus here is on log analysis, event correlation, timestamp review, user behavior, executed processes, network connections, and any evidence that can justify a classification.
Alerts should be classified as:
- True Positive: when the alert represents confirmed malicious activity or a real threat validated through logs.
- False Positive: when the alert was generated by benign activity, noise, an overly sensitive rule, or when there is not enough evidence to confirm malicious activity.
For this example, a fictional scenario related to GoodGames will be used. The structure is shown only for educational purposes, to understand how to organize this part of the report.
Scope
This subsection defines which platform, host, or log source was used to perform the alert analysis.
This is where the evaluated SIEM system, its description, and any resource related to the defensive review are usually listed.
| Host/URL/IP Address | Description |
|---|---|
| ELK01 | GM Elastic SIEM |
This table helps make clear what the main source of evidence was for alert validation.
Deliverables
This subsection explains what the analyst should deliver as a result of the defensive review.
The analyst must review the security alerts generated by the Elastic SIEM platform in response to simulated activity within the controlled environment. Each alert must be analyzed using evidence obtained from the available logs.
The result of this review should be presented in a dedicated table called SIEM Alert Validation and Analysis, where each alert is classified as True Positive or False Positive.
The evidence must be based on the analysis of events observed in the SIEM. This may include executed processes, authentications, network connections, involved users, file paths, affected hosts, timestamps, and any other relevant information needed to justify the classification.
The goal of this section is not only to mark an alert as true or false, but to explain why that conclusion was reached.
SIEM Alerts
This subsection lists the alerts that will be analyzed.
This table works as an initial alert inventory. It includes the alert number, name, brief description, affected host, and the timestamp when it was generated.
| No. | Alert Name | Description | Host | Alert Timestamp |
|---|---|---|---|---|
| 1 | Multiple Failed SSH Authentication Attempts | Multiple failed SSH login attempts were detected against the host within a short time window. This behavior may indicate password guessing, credential stuffing, or unauthorized access attempts. | GM1 | Jun 13, 2025 @ 10:27:00.000 |
SIEM Alert Validation and Analysis
This subsection contains the structured analysis of each alert.
Here, each alert should be marked as either a True Positive or a False Positive, along with the evidence supporting the decision. The evidence should be clear, concrete, and based on the reviewed logs.
In this part, it is important to avoid generic explanations. Each conclusion should be tied to events observed during the analysis.
| Alert No. | True Positive | False Positive | Evidence |
|---|---|---|---|
| 1 | X | False Positive. The alert was reviewed and the behavior described by the rule could not be validated. Elastic logs showed limited SSH authentication activity on GM1 around the reviewed time window; however, no evidence was found of repeated failed login attempts, password guessing, credential stuffing, or brute-force activity. Follow-up searches for SSH authentication failures, repeated source IP addresses, multiple usernames, and successful login events after failed attempts did not identify suspicious activity. No unauthorized access, privilege escalation, lateral movement, payload execution, or persistence activity was observed around the alert timestamp. |
The Evidence column is the most important part of this table. This is where you should explain what was observed in the logs and why that confirms or rules out the alert.
How to Structure the Evidence
For the evidence to be clear, each analysis should answer:
- Which alert was reviewed.
- Which host was affected.
- Which timestamp or time window was analyzed.
- Which events were found in the SIEM.
- Which expected events were not found.
- Why the alert was classified as True Positive or False Positive.
Good evidence should not be limited to saying “confirmed” or “not confirmed”. It should briefly explain which observed data supports that decision.
Appendix
The Appendix section is used to include additional information that supports the content of the report.
In the CJCA template, this part usually works as a complementary section where details can be documented that are not necessarily part of the main body of the report, but are still important for validating the work performed.
In this example, the appendix is divided into the following subsections:
- Finding Severities
- Obtained Flags
- Flag Evidence Screenshots
Finding Severities
This subsection describes how the severity levels used in the report are interpreted.
Its objective is to explain to the reader what each risk level means and how the remediation of identified findings should be prioritized.
Normally, severities can be organized as follows:
| Severity | Description |
|---|---|
| High | Vulnerabilities that can lead to unauthorized access, sensitive data exposure, privilege escalation, or significant compromise of the affected system. |
| Medium | Vulnerabilities that increase risk but may require additional conditions to be exploited or have a more limited impact. |
| Low | Issues with limited direct impact, but that may contribute to a broader attack chain if combined with other weaknesses. |
This section helps the reader understand why a finding was assigned a certain severity and what priority it should have within the remediation plan.
Obtained Flags
This subsection is used to document the flags obtained during the assessment.
In a Hack The Box environment, flags serve as evidence that access was obtained at certain system levels, such as a standard user or a privileged user.
| IP/Host/Target | File name | Flag |
|---|---|---|
| 10.129.30.54 (GoodGames) | /home/augustus/user.txt | 3acb1a3122f445af18ecf1c853aa48e0 |
| 10.129.30.54 (GoodGames) | /root/root.txt | 9b17efdf8ef3a20e54f2bd2b38fc756d |
It is important for the flags documented in this table to match the evidence included in the report and the screenshots used for the final submission.
Flag Evidence Screenshots
This subsection can be added to include screenshots of each obtained flag.
This is where the images demonstrating the reading of the flags should be placed, following the format requested by Hack The Box. The screenshots should be clear, show enough system context, and match the flags documented in the previous table.
For example, you can organize it like this:
User Flag Evidence
Host: 10.129.30.54 (GoodGames)
File: /home/augustus/user.txt
Root Flag Evidence
Host: 10.129.30.54 (GoodGames)
File: /root/root.txt
The goal of this subsection is not to repeat the entire technical process, but to provide clear visual evidence that the flags were obtained correctly.
Findings
The Findings section is one of the most important parts of the report, since this is where each vulnerability identified during the assessment is documented.
Unlike the walkthrough, where the compromise chain is explained step by step, this section presents each finding individually. The goal is for the reader to understand what vulnerability was found, what its impact is, which components are affected, and what actions should be taken to fix it.
Each finding should follow a consistent structure to make the report easier to read and review.
Recommended Structure for Each Finding
Each finding should include the following sections:
- Title
- Severity
- CVSS
- Summary
- Impact
- Affected Components
- Recommendations
- References
- Technical Description
Title
The title should describe the finding clearly and directly.
It should be specific enough for the reader to quickly understand what problem was identified.
Example:
Server-Side Template Injection in Internal Administration PortalA good title should avoid being too generic. For example, instead of writing only Injection Vulnerability, it is better to indicate the type of injection and where it was found.
Severity
Severity indicates the level of risk associated with the finding.
This classification should be related to the real impact of the vulnerability, the ease of exploitation, the level of access obtained, and the context of the affected system.
Example:
HighIn general, a vulnerability that allows unauthorized access, extraction of sensitive information, command execution, or privilege escalation should have a high or critical severity, depending on the impact.
CVSS
The CVSS section is used to assign a technical score to the finding.
This score helps justify the severity using a standard metric. Although it may seem optional in a lab, including it is good practice because it gives the report a more formal structure.
Example:
CVSS: 8.8
CVSS Vector: CVSS:3.1/AV:N/AC:L/PR:L/UI:N/S:U/C:H/I:H/A:H
The score should make sense with the impact described in the finding. It is not advisable to assign a high CVSS score if the real impact is limited.
Summary
The Summary should briefly explain the finding.
This is where you describe what vulnerability was found, where it was identified, and why it represents a risk.
Example:
The internal administration portal was vulnerable to Server-Side Template Injection. After authenticating with recovered administrator credentials, the Tester identified that user-controlled input in the profile/name field was evaluated by the server-side template engine.This part should be clear and not too long. The full technical detail is developed later in Technical Description.
Impact
The Impact explains what an attacker could achieve by exploiting the vulnerability.
This section should answer why the finding matters and what consequences it could have for the organization.
Example:
Successful exploitation of this vulnerability could allow an authenticated attacker to execute template expressions on the server. Depending on the template engine configuration, this could lead to sensitive data exposure, application compromise, or remote code execution.The impact should be connected to what was actually validated during the test.
Affected Components
In Affected Components, the affected systems, hosts, applications, endpoints, parameters, or functionalities are documented.
Example:
Affected Host: 10.129.30.54
Affected Application: GoodGames Internal Administration Portal
Affected Functionality: Profile name update
Affected Parameter: name
This section helps identify exactly where the issue needs to be fixed.
Recommendations
In Recommendations, the suggested actions to fix the finding are listed.
Recommendations should be specific and related to the identified vulnerability.
Example:
The application should avoid rendering user-controlled input directly inside server-side templates. User input should be treated as data, not as executable template syntax. Additionally, input validation should be implemented, template sandboxing should be enforced where supported, and security testing should be added to identify template injection issues before deployment.It is not recommended to write only generic phrases such as “improve security”. Each recommendation should indicate what needs to be changed or reviewed.
References
In References, you can include links or technical references that help explain the vulnerability and its remediation.
Example:
- OWASP Server-Side Template Injection
- OWASP Input Validation Cheat Sheet
- PortSwigger Web Security Academy - Server-Side Template Injection
References do not replace the explanation of the finding, but they help support the technical description and recommendations.
Technical Description
The Technical Description contains the technical explanation of the finding and the evidence that demonstrates its existence.
This is where short, clear evidence directly related to the vulnerability should be included. It is not necessary to repeat the entire walkthrough. Ideally, include the minimum context, the command or payload used, the observed result, and the corresponding image.
Example:
After accessing the internal administration portal with the recovered administrator credentials, the Tester tested the profile/name field using a basic template expression. The application evaluated the payload and returned the calculated result, confirming Server-Side Template Injection."{{7*7}}"Result:
49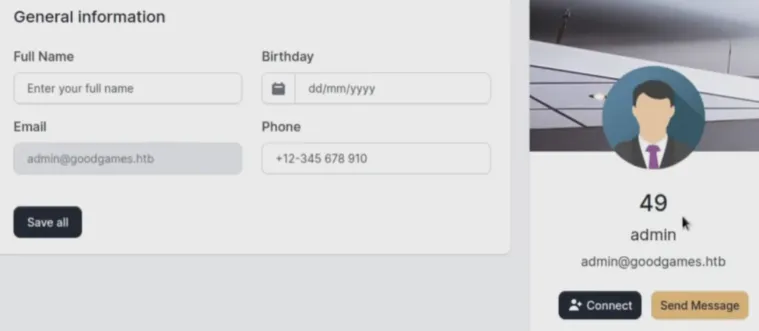
The evidence should be enough to demonstrate the finding without overloading the report with unnecessary information.
Good technical evidence should answer:
- Which functionality was tested.
- Which payload, command, or action was used.
- What result was obtained.
- Why that result confirms the vulnerability.
- Which image supports the evidence.
Example Report in PDF
Now that you know the main sections of the template and the purpose of each one, I prepared an example PDF report using the Hack The Box GoodGames machine as the reference scenario.
If you made it this far in the post, you already have a general idea of how a CJCA-style report is structured: executive summary, scope, findings, walkthrough, remediations, example defensive analysis, and appendices. For that reason, the goal of this PDF is to show what all that content would look like when integrated into a more complete and organized document.
Download sample report PDF